-
Welcome to this forum . We are a worldwide group with a common interest in Birmingham and its history. While here, please follow a few simple rules. We ask that you respect other members, thank those who have helped you and please keep your contributions on-topic with the thread.
We do hope you enjoy your visit. BHF Admin Team
You are using an out of date browser. It may not display this or other websites correctly.
You should upgrade or use an alternative browser.
You should upgrade or use an alternative browser.
As Seen From Our Gardens 2026
- Thread starter Astoness
- Start date


Mark Tooze
master brummie
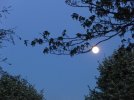
Moonset over our snowy Sutton Coldfield garden this morning:- 
and moon at 3.50am this morning (I had an early start to work today)
and moon at 3.50am this morning (I had an early start to work today)
Mark Tooze
master brummie
Also managed to get some photos of Jupiter and all 4 of its Galilean satellites in the last few weeks. Photographing Jupiter is a bit of a dark art (these are taken with a camera and very big lens, not through a telescope) - you have to wait for a moonless, cloudless night otherwise you loose the surface markings, or satellites, or both. Then some post-processing is required as the moons and Jupiter require vastly different exposures and you have to combine 2 or more images to get the final shot:-


Best one I've took for Jupiter surface detail recently is this one - 3 moons only visible (4th is behind Jupiter probably):-

Best one I've took for Jupiter surface detail recently is this one - 3 moons only visible (4th is behind Jupiter probably):-

Mark Tooze
master brummie
Earth and Jupiter are currently at the closest point they will be for the next 10 years - so ideal time for photography. Add a crystal clear night just before midnight yesterday and I managed to get this one:-

All 4 Galilean satellites and excellent cloud detail. Moons from the left - Ganymede, Europa, Io and Callisto
All 4 Galilean satellites and excellent cloud detail. Moons from the left - Ganymede, Europa, Io and Callisto
Last edited:
Mark Tooze
master brummie
And another nice one last night:- 
Moons from the left - Ganymede, Io, Europa and Callisto
Moons from the left - Ganymede, Io, Europa and Callisto
Last edited:


Mark Tooze
master brummie
Last nights view - fascinating to watch the "dance of the moons" - from left to right Europa, Ganymede, Io and Callisto:-And another nice one last night:- View attachment 217015
Moons from the left - Ganymede, Io, Europa and Callisto

Mark Tooze
master brummie
For the first time in about a fortnight we had a relatively clear night last night. Had the opportunity to photograph Jupiter at approx. 9pm, 10pm and 11.30pm - so you can see the movement of the Galilean moons over a shorter period of time - from the left Ganymede, Europa, Io, Callisto:-
9pm:-
10pm:-

11.30pm:-

Also got some nice moon shots last night:-


9pm:-
10pm:-
11.30pm:-
Also got some nice moon shots last night:-
Wow ! A reminder of how small we are in the greater scheme of things.
Mark Tooze
master brummie
Clear skies again last night (a rare occurence at present) - got Jupiter and 4 main moons (left to right Callisto, Ganymede, Europa and Io):-

And a gorgeous moon:-

And a gorgeous moon:-
Smudger
master brummie
It`s mind blowing how these giant planets/suns just hang in the sky. Fascinating !Clear skies again last night (a rare occurence at present) - got Jupiter and 4 main moons (left to right Callisto, Ganymede, Europa and Io):-
View attachment 219217
And a gorgeous moon:-
View attachment 219219
Mark Tooze
master brummie
Jupiter on Feb 28th:-

Moons from the left - Callisto, Europa, Io, Ganemede
Moons from the left - Callisto, Europa, Io, Ganemede
Mark Tooze
master brummie
Hi Johnny; these were taken with a Canon EOS750D DSLR camera, and a Tamron 150-600 4.5-6.3 Superzoom at full zoom. All but the latest Jupiter shot were handheld, but only because I could not be bothered to get a tripod out. The more megapixels in the camera chip the better - the 750D has 24.1MP. Keep image stabilisation on the lens on if it has it, and remove the UV filter if you have one on (which normally you should to protect the lens) - otherwise you may get flare off the filter as the moon is so bright. Do not add a teleconverter - loss of image quality outweighs the extra magnification - you can zoom in on your editing tool, and 100ASA on a 24.1MP chip gives you a LOT of zooming.....
Moon - exposure will vary from night to night depending on phase, position in sky, time of day, etc. I always use shutter priority at 100ASA, ignore the camera exposure meter and shoot a range of exposures from 1/500 sec down to 1/25 sec. Then look for the best ones afterwards in your edit tool (bigger the moon phase, shorter the exposure). I find the best ones are under exposed by about 2-3 stops - this allows the smaller craters away from the terminator to be seen. Put this into any editing tool, tweak the brightness and contrast up a bit (not a lot), zoom in and you get a nice result. Trial and error. Full moon - under expose by around 3 stops (you may need to go to 1/1000 sec) - then push contrast up a lot.
Jupiter - these are composite shots - one of the planet, one of the satellites - you cannot get both the cloud bands and the satellites in the same shot - well not with this level of kit anyway! Shoot in shutter priority mode at 600mm zoom..
Planet - range of exposures from 1/400 to 1/60 second at 100ASA. Increase brightness and contrast a bit in edit tool.
Satellites - range of exposures from 1/100 to 1/20 second at 800ASA. Increase brightness a lot in edit tool.
Use https://theskylive.com/galilean-moons to work out which moon is which - you can set this to local time, and it will also show the red spot position, although it is just beyond my kit.
Edit - first find best shot of the moons - match it to what is on the website above to work out which is which. Copy this image somewhere (I use powerpoint) - note the magnification, then find your best image of Jupiter (exposures can vary night by night - see moon above) - screenshot just the planet at same magnification, then copy it over the white blob in the moons image to create your composite image. Works so long as one of the moons is not right next to the planet:-


These methods work for me - other folk may be able to suggest better ways (yes please!!!).
Finally - if it is even slightly cloudy or hazy - don't bother that night - you will loose all the fine detail on the moon and Jupiter will be a featureless blob.
And - don't forget to let camera and lens de-condense when you take them back indoors otherwise you are in for a cleaning job before you can use the kit again.
If you do not have a big lens you can still indulge - near full moon, Jupiter and Orion taken 3 nights ago (I forgot to take UV filter off 30mm prime lens and you can see the flare on the moon as a result):-

Finally - YOU ARE NEVER TOO OLD!!!! Add a tripod and a wired cable release into the mix if you cannot hold the camera - all of these were taken from our back yard in Sutton Coldfield so travelling not required. Nearly all my kit is second hand - the camera body was only £150, but the lens was more expensive (£480 - but still a snip at that price). Good dealers like Park Cameras, Wex or CeX have a good selection online and will not scam you. Avoid Ebay like the plague!!!!!
Moon - exposure will vary from night to night depending on phase, position in sky, time of day, etc. I always use shutter priority at 100ASA, ignore the camera exposure meter and shoot a range of exposures from 1/500 sec down to 1/25 sec. Then look for the best ones afterwards in your edit tool (bigger the moon phase, shorter the exposure). I find the best ones are under exposed by about 2-3 stops - this allows the smaller craters away from the terminator to be seen. Put this into any editing tool, tweak the brightness and contrast up a bit (not a lot), zoom in and you get a nice result. Trial and error. Full moon - under expose by around 3 stops (you may need to go to 1/1000 sec) - then push contrast up a lot.
Jupiter - these are composite shots - one of the planet, one of the satellites - you cannot get both the cloud bands and the satellites in the same shot - well not with this level of kit anyway! Shoot in shutter priority mode at 600mm zoom..
Planet - range of exposures from 1/400 to 1/60 second at 100ASA. Increase brightness and contrast a bit in edit tool.
Satellites - range of exposures from 1/100 to 1/20 second at 800ASA. Increase brightness a lot in edit tool.
Use https://theskylive.com/galilean-moons to work out which moon is which - you can set this to local time, and it will also show the red spot position, although it is just beyond my kit.
Edit - first find best shot of the moons - match it to what is on the website above to work out which is which. Copy this image somewhere (I use powerpoint) - note the magnification, then find your best image of Jupiter (exposures can vary night by night - see moon above) - screenshot just the planet at same magnification, then copy it over the white blob in the moons image to create your composite image. Works so long as one of the moons is not right next to the planet:-
These methods work for me - other folk may be able to suggest better ways (yes please!!!).
Finally - if it is even slightly cloudy or hazy - don't bother that night - you will loose all the fine detail on the moon and Jupiter will be a featureless blob.
And - don't forget to let camera and lens de-condense when you take them back indoors otherwise you are in for a cleaning job before you can use the kit again.
If you do not have a big lens you can still indulge - near full moon, Jupiter and Orion taken 3 nights ago (I forgot to take UV filter off 30mm prime lens and you can see the flare on the moon as a result):-
Finally - YOU ARE NEVER TOO OLD!!!! Add a tripod and a wired cable release into the mix if you cannot hold the camera - all of these were taken from our back yard in Sutton Coldfield so travelling not required. Nearly all my kit is second hand - the camera body was only £150, but the lens was more expensive (£480 - but still a snip at that price). Good dealers like Park Cameras, Wex or CeX have a good selection online and will not scam you. Avoid Ebay like the plague!!!!!
Last edited:
Wow Mark, thanks so much for your detailed description of the process you take. How I would love to be able to do it but at 94 my time of following it has long gone. Photography was a passion for me as My uncle was in the Birmingham Photopraphic club and taught me all I knew. Those were the days, how things have changed since my old Browkie Box camera. I look forward to seeing more from you in the future
Mark Tooze
master brummie
Hi Johnny thank you for your kind words - sorry if write-up was a bit technical but I could not word it any other way. Box Brownies could give excellent photos - I have hundreds of old family negatives taken with this type of camera. The only major difference with the type of kit above is that you have better flexibility and more options. Best thing about digital is that, after the outlay on equipment the only ongoing cost is an occasional battery recharge! I learnt photography at school taking photos for my A-level art projects (steam engines, garages, old buildings etc - most of these where relevant are posted elsewhere on the forum). I then taught it at night school some years later for a while but had to pack this up as it clashed with working away from home on my normal job. Picked it up again in anger when I was 60. Now I enjoy it like I used to again.
Mark Tooze
master brummie
Lovely sight last night - super-thin crescent moon and Venus hanging right below it:-

If you caught it at the correct time you could see Earthshine on the unlit portion of the moon - this is through the spiders web of the telegraph pole by our house:-

It is difficult to get any detail on thin crescent moons, but I did get this one which is quite nice:-

If you caught it at the correct time you could see Earthshine on the unlit portion of the moon - this is through the spiders web of the telegraph pole by our house:-
It is difficult to get any detail on thin crescent moons, but I did get this one which is quite nice:-
Mark Tooze
master brummie
Apologies for the late postings - have not had the time!
We had a nice "planet parade" at the end of April - images from the 19th are above. Moving on to the 21st we see Jupiter (top left), the moon (centre) and Venus (bottom right)in a line:-

And in close up; Jupiter:-

The Moon:-

And Venus - you can just about make out the phase:-

We had a nice "planet parade" at the end of April - images from the 19th are above. Moving on to the 21st we see Jupiter (top left), the moon (centre) and Venus (bottom right)in a line:-
And in close up; Jupiter:-
The Moon:-
And Venus - you can just about make out the phase:-
Mark Tooze
master brummie
Moving onto the 22nd - Jupiter (bottom left) is now hanging close below the moon:-

The moon:-

As it was slightly hazy I could not get any decent photos of Jupiter that night.
The moon:-
As it was slightly hazy I could not get any decent photos of Jupiter that night.
pjmburns
master brummie
Mark Tooze
master brummie
To celebrate Villa's Europa league win, we had another "Planet Parade" last night - Moon, Jupiter and Venus from top left to bottom right:-

